
How to use RopeMaster
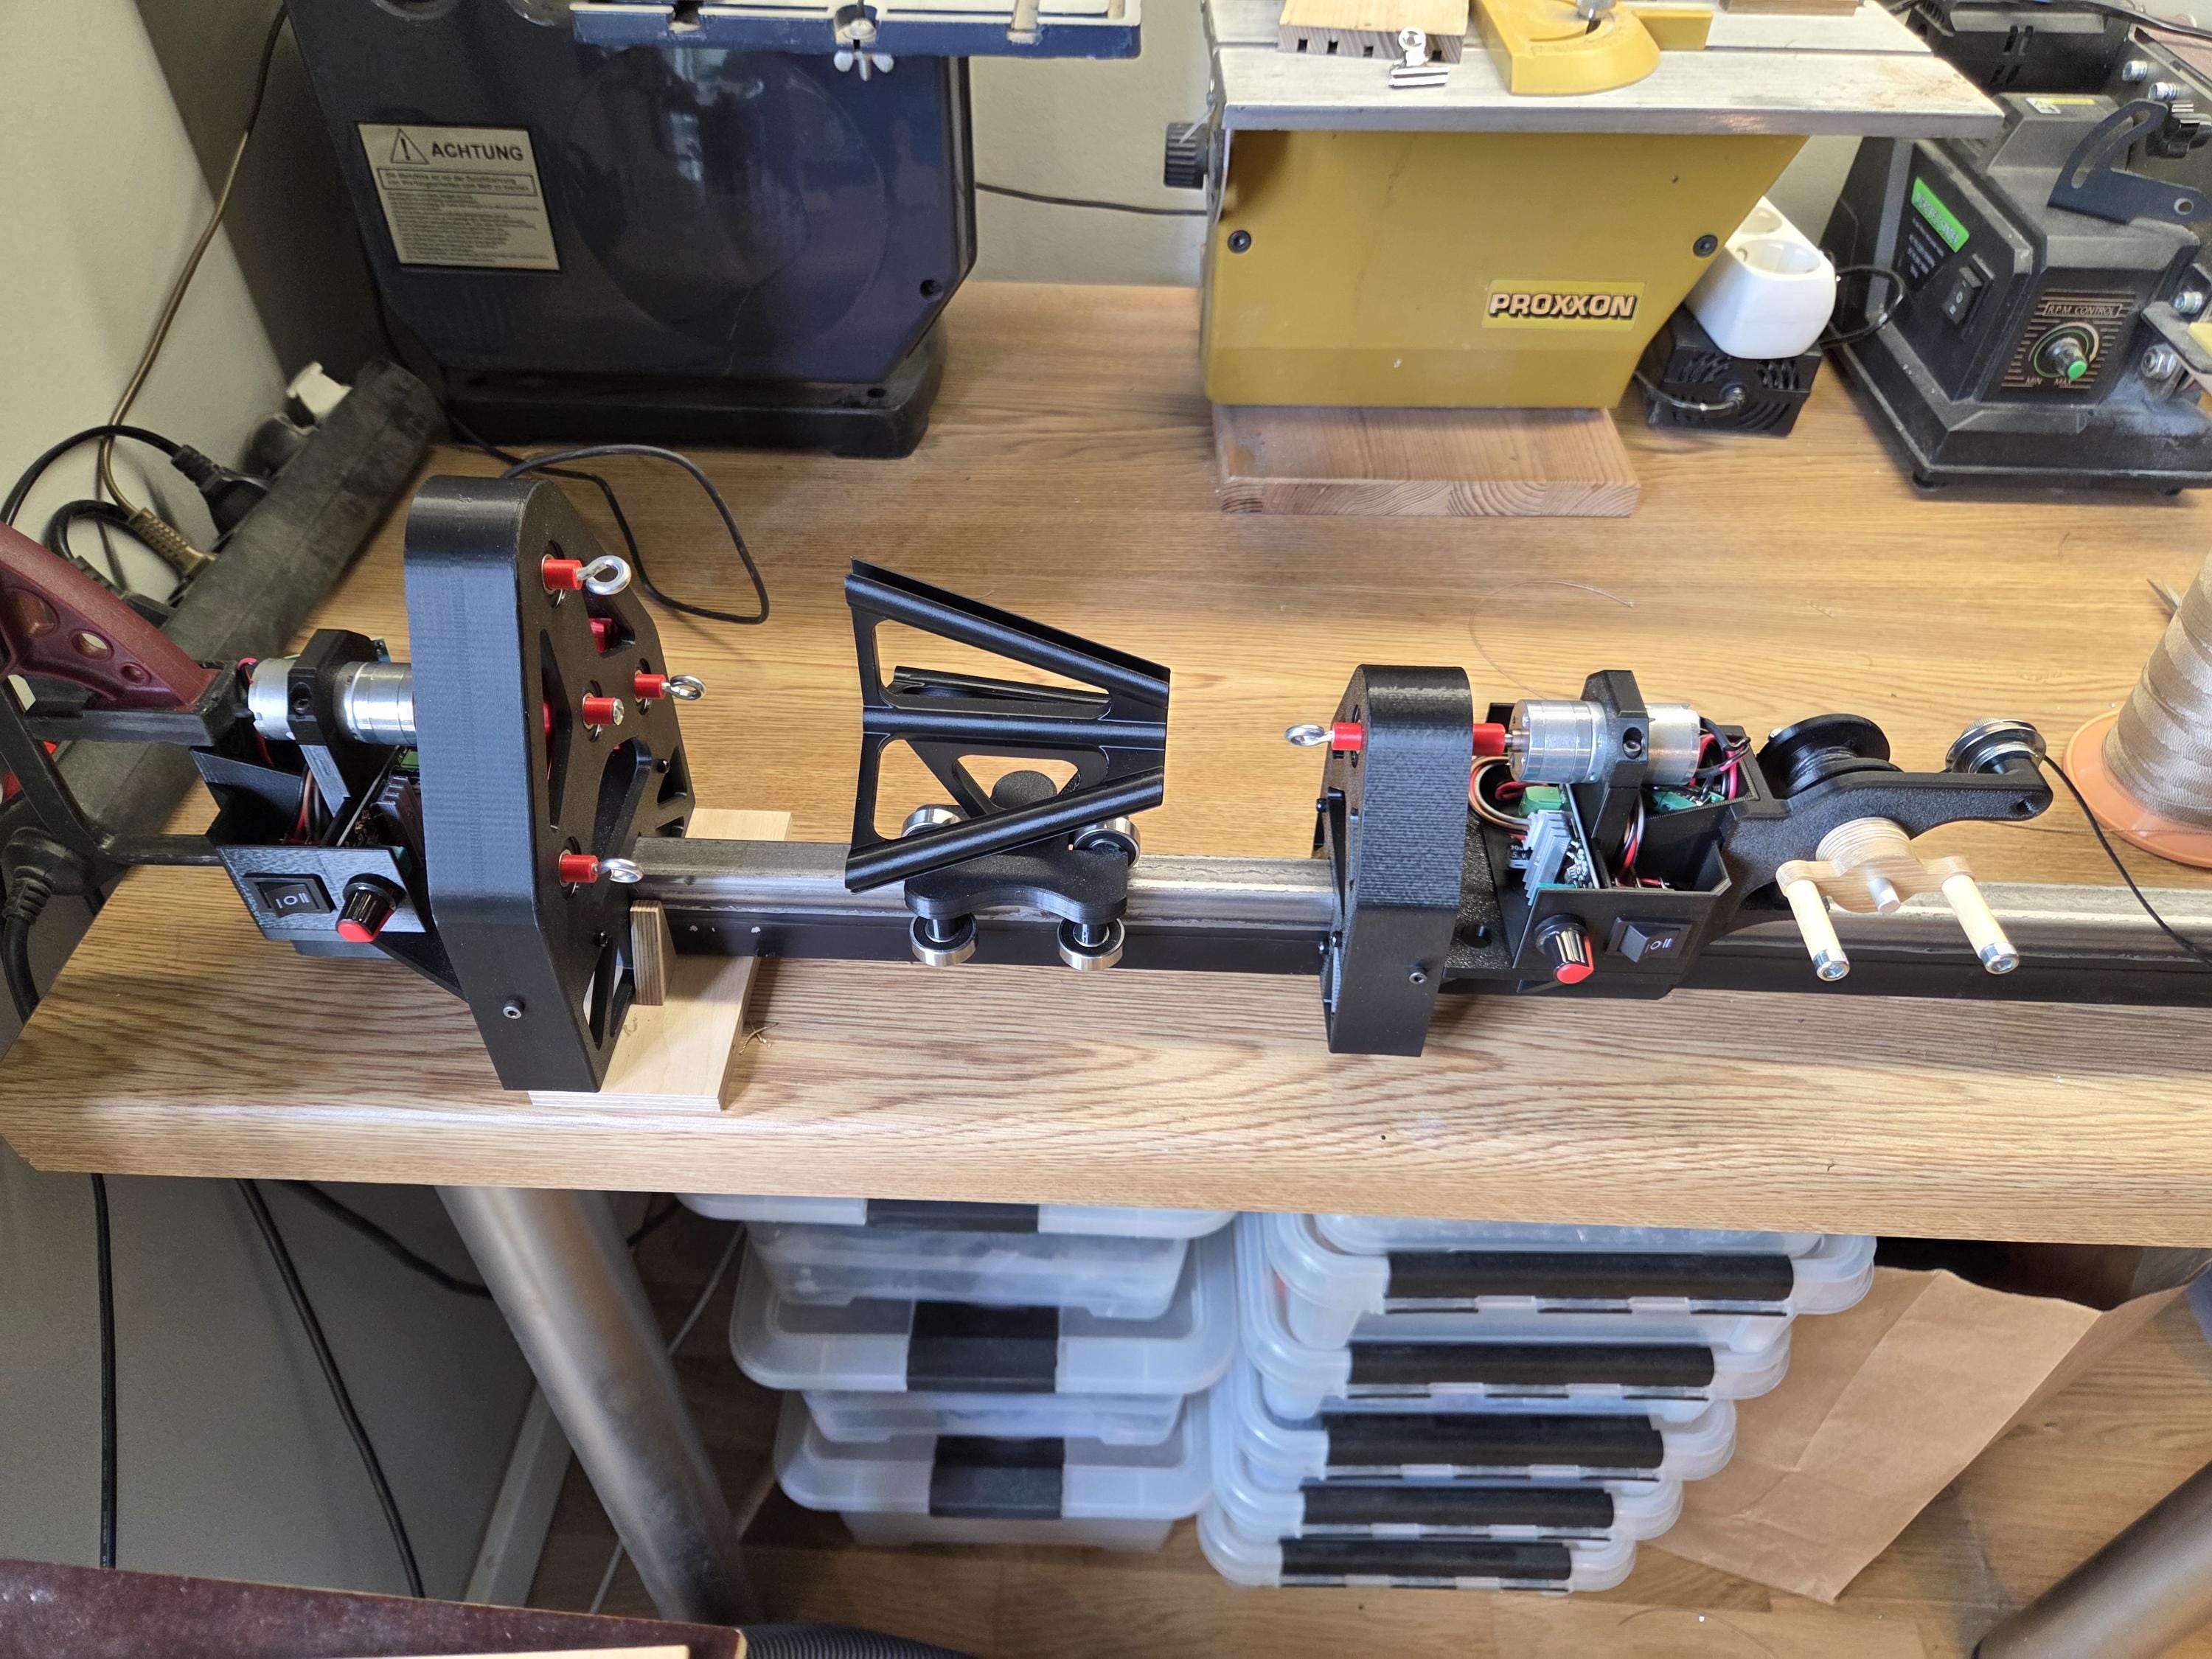
Setup and operation
How to use RopeMaster
Connecting the parts, tensioning the strings, running the machine, and the checks to make before you start.
These are the setup and operating instructions for the RopeMaster. Read them through once before you run the machine for the first time, particularly the section on the automatic stop and the checklist at the end.
Watch the video guide first. It shows the assembly, tensioning and operation in a few minutes, and it is easier to follow than any written description: how to assemble, tension and operate the machine.
Download these instructions as a PDF if you would rather print them or keep them beside the machine.
Power connections
The power adapter cable is marked with red tape. Connect this plug to the red socket on Part 1.
The second socket on Part 1 is used to connect Part 2. The cable for connecting Part 1 and Part 2 is included with the machine.
The remote controllers are also marked 1 and 2:
- Remote 1 — Part 1
- Remote 2 — Part 2
Building a machine longer than 2 m
If you want to build a machine longer than 2 m, you only need to use a longer cable between Part 1 and Part 2. This is a standard power cable commonly used in car audio installations.
Important: use the same wire diameter as the original cable. Do not use a thinner wire.
Setup
1. Attach Part 1 to the aluminium rail
Place the aluminium rail on a stable and straight surface. Attach Part 1 to the beginning of the aluminium rail.
You can normally use just one bolt to secure Part 1, because there is not much force acting on this connection. Make sure Part 1 is firmly attached and cannot move.
2. Install the black stopper
Before Part 2, make a small hole in the aluminium rail and insert the black stopper into the hole. The stopper looks like a small black key.
The black stopper keeps Part 2 in place while you attach and tension the strings. Do not remove the stopper yet.
3. Connect and adjust the rope brake
Make sure the black rope brake is connected to an L-shaped anchor or another suitable fixing point, and check that the brake is working correctly.
The brake can be adjusted using the butterfly nut. Do not be afraid to turn the butterfly nut — this is how you adjust the braking force. The correct brake pressure is important for smooth operation.
4. Attach the strings
Attach as many strings as you need to the hooks. Try to make all strings have approximately the same initial tension.
The black stopper holds Part 2 in place while you attach the strings, which makes it easier to get similar tension on all of them.
5. Remove the black stopper
Once all strings are attached:
- Check that all strings are connected correctly.
- Make sure the strings are not crossed or tangled.
- Remove the black stopper.
- Turn on Part 1 using Remote 1.
6. Tension the strings
Part 1 will start turning and gradually increase the tension in all strings. As the tension increases, Part 2 will move away from Part 1.
- For a 2 m machine, allow Part 2 to move approximately 10–15 cm.
- For a 4 m machine, allow Part 2 to move approximately 20–30 cm.
The exact distance is not critical. The goal is to achieve good and even tension without putting excessive tension on the strings.
7. Stop Part 1
When the desired tension has been reached and Part 2 has moved approximately the required distance, turn off Part 1 using Remote 1.
8. Position the Spider
Move the Spider to the end of the machine. Make sure all strings go correctly through the Spider's guides, and check every string carefully.
Make sure:
- All strings are going through the Spider correctly.
- No strings are crossed.
- No strings are tangled.
- No strings are trapped.
- The strings are still properly tensioned.
9. Start Part 1 and Part 2
Once all strings are correctly positioned through the Spider:
- Turn on Part 1 using Remote 1.
- Turn on Part 2 using Remote 2.
Both parts should run at full speed. The Spider should now move smoothly toward Part 1.
10. Check the automatic stop
Watch the Spider as it moves toward Part 1. When the Spider reaches Part 1, it should touch the switch and automatically stop the machine.
Do not leave the machine unattended during the first test. If the Spider does not stop when it reaches Part 1, turn off the machine immediately and check the switch and wiring.
Adjusting the rope brake
If the Spider moves very slowly or in a jerky or bumpy way, adjust the rope brake. Use the butterfly nut to change the brake pressure, making small adjustments and testing the machine again.
Very thin strings, such as 0.1 mm, are more flexible and may require slightly more tension.
Do not use excessive brake pressure. The goal is to achieve smooth and consistent movement.
Before operating the machine
- Set both Part 1 and Part 2 to full speed.
- Make sure the Spider can move freely along the entire rail.
- Make sure all strings are correctly positioned.
- Make sure no strings are tangled or trapped.
- Make sure the rope brake is securely attached.
- Check that the automatic stop switch works correctly.
- Never put your hands or fingers near moving parts while the machine is running.
- Do not leave the machine unattended while operating.
The Spider should move smoothly and continuously along the rail. If the movement is too slow, too fast or uneven, adjust the rope brake using the butterfly nut.